Shipping Orders with batch fulfilment
From Spiffy Stores Knowledge Base
Once you have activated and configured your batch Fulfilment Service, and orders have been placed by your customers, you'll be able to process the orders and have the items shipped using the fulfilment service.
Contents
Processing Orders
Order Fulfilments

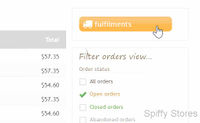
If you have an active batch fulfilment service, you will find a new button to your fulfilments in the Orders overview page of the Toolbox.
This will take you to the fulfilment management pages that will allow you to manage the process of submitting your shipments to the batch fulfilment service.
The process starts by shipping items from your new orders.
Marking Items as Shipped
New Order Processing

Selecting a shipping service

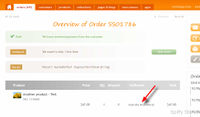
When you want to ship items in an order, click on the ship items button as usual. You will be able to identify items that will be shipped by a fulfilment service by the notation against the item. In the example, the item will be shipped by Australia Post eParcel.
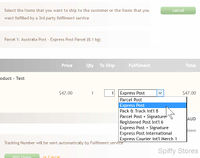
You will need to confirm that you want to ship the selected items from the order. In some cases, where the fulfilment service has been configured to prompt you, you may need to select a shipping service for the fulfilment service to use for the item.
For example, the customer may have selected to pay extra for express post, so you will need to select the Express Post option from the selection for the item.
In other cases, the shipping rate selected by the customer may be automatically assigned to a specific shipping service, so no further input from you is required.
When everything is done and all the options have been selected, click the ship items button the confirm the shipment.
Processing the fulfilment shipment

A shipped order

Once an order has been processed, the items will become part of a Fulfilment Shipment, and a link is created from the order to the fulfilment shipment.
A Fulfilment Shipment represents the parcels that need to be shipped to a specific customer, and these shipments make up an unshipped Fulfilment.
Managing Fulfilments
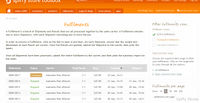
Fulfilment Overview

A Fulfilment contains one or more shipments, all of which are to be shipped together in a single batch.
At the end of the day, when you've processed and packed all your orders, you will submit the fulfilment for delivery. Then you will either take all the parcels to the post office or depot, or you will arrange for them to be picked up. The manifest or summary of the order will need to be printed and submitted with the parcels when they are picked up or dropped off.
At any time, there will only be one unshipped fulfilment. As you process additional orders, the shipments will be added to the current unshipped fulfilment.
If, for any reason, you are unable to process a shipment, it will be rolled over to the next fulfilment once the current fulfilment has been shipped.
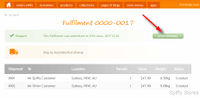
Finalizing your shipment

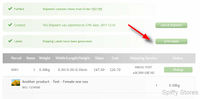
Fulfilment Shipment

A shipment will consist of one or more parcels, each containing one or more items.
All parcels in the shipment are sent to the customer's address as specified at the top of the shipment page.
If any of the address details are incorrect, you can edit them as needed.
The order processing software will attempt to arrange items optimally into multiple parcels if necessary, but you may need to adjust this when you are actually packing the items.
Items can be moved from one parcel to the next by dragging and dropping the item using the drag icon at the right-hand side of the item row.
Items can even be dragged into the blank area at the top of the table to create new parcels.
Once your items are packed and match the layout in the Toolbox, then you can confirm each parcel by clicking on the Confirm button.
Confirm the parcel weight and dimensions

Confirm Parcel

You will need to confirm that each parcel has the correct weight and dimensions recorded. You may not need to enter the parcel dimensions, depending on your contract arrangements with the fulfilment service.
Once you have confirmed these details, select the confirmation tick box, then click the Update Parcel button.
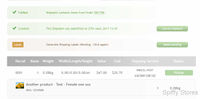
Submit the shipment
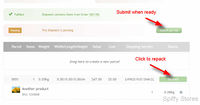
Shipment ready to submit

Once all parcels have been confirmed, you will be ready to submit the shipment.
If any parcel needs to be repacked, you can click on the Packed button to reset the parcel and to update its details.
Once the shipment has been submitted, you still have the opportunity to cancel the shipment, update it and resubmit it later.
Print Labels
Pending Labels

Print Labels

Once the shipment has been submitted, the tracking number and tracking status for each parcel will be displayed.
At this point you will need to generate the labels for the parcels. Click on the labels pending button to complete the label generation process.
You will be able to click on the print labels button to open the generated labels ready for you to print on either pre-printed stationary, or blank stationary according to the label printing settings that were configured for the fulfilment service.
It is important to print your labels and attach them to your parcels as they are packed and processed. Once the fulfilment is submitted as an order, the labels will no longer be available for printing.
Your shipment is now ready for pickup.
Creating a Fulfilment Order
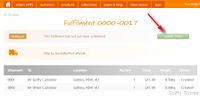
Fulfilment Ready to submit

The final step, once all the parcels have been packed, submitted to the fulfilment service and labels printed, is to submit the entire lot to create an order with the fulfilment service.
Once an order has been created, you cannot cancel or resubmit any part of the fulfilment without contacting the fulfilment service provider directly.
Click on the submit order button to create the order.
Print the Summary Report
Fulfilment Summary

A summary report will be created which lists all the parcels that have been submitted. Click on the print summary button to print a copy of the report and include this with your parcels when they are picked up or dropped at a depot or post office. The report includes a declaration which needs to be signed.